You are browsing the archive for move order.

Move Order Issue

  • Form Application: Inventory
  • Form Name: INVTOMAI
  • Form Path: /oracle/apps/r12/visr12/apps/apps_st/appl/inv/12.0.0/forms/US/INVTOMAI.fmx

Move Orders not only used like ‘subinventory transfers’ to move between two subinventories, but thy can be used to issue material to a GL account similar to account Issue or account alias issue. MOVE ORDER TRANSFER transaction is used to transfer material. MOVE ORDER ISSUE transaction is used to issue material to a GL a/c

Move Order Issue - Oracle Inventory
Description
Move Orders can be used for move or issue material. In this tutorial you will learn how to use Move Orders to issue material against a GL charge a/c.
For more details visit http://oracleappscommunity.com/oracle/blog/2068/move-order-issue/

Navigation: Login to Oracle Apps -> Select Inventory responsibility -> Move Orders -> Move Orders.

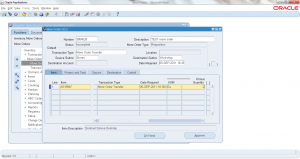
  • Number: Enter the move order number or leave it blank for auto numbering
  • Description: Brief description of move order
  • Transaction Type: Select as Move Order Issue
  • Source Subinventory: Select ‘From’ subinventory from which material should be withdrawn. Onhand must exist at this subinventory.
  • Source locator: If the item is locator control enter the source locator.
  • Destination A/c: Enter the GL account to be charged
  • Date Required: Change the date required, default date will be current date.

Go to move order lines and enter additional information.

  • Item: Enter the item that should be moved/transacted.
  • Transaction Type: Defaulted from header, but can be changed at line level.
  • Date required: Defaulted from header, but can be changed at line level.
  • UOM: Enter the transaction Unit of measure
  • Primary Quantity: Enter the ‘quantity’ to be transacted.
  • Source subinventory/locator: Under ‘source’ tab change the default subinventory/locator if required.
  • Account: Enter account to be used to charge the material issued for this line.
  • Project and Task: If the material transfer is belongs to a project, enter the project/transfer information.
  • Reason/Reference: Under ‘control’ tab enter the transaction reason and reference, this is optional.
Create Move Order
Create Move Order

Save the information entered, Click ‘Approve’ to approve the Move Order.

If Move Order approval workflow is setup and configured then it will go through the approval workflow, otherwise it will get auto approved.

Move Order status changed to ‘APPROVED’. Note down the move order number. Next step will be to issue the material (transact move order).

Navigation: Login to Oracle Apps -> Select Inventory responsibility -> Move Orders -> Transact Move Orders.

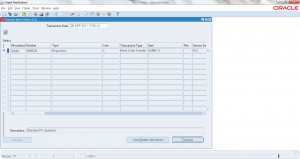
  1. Enter the ‘Move Order From’ and ‘Move Order To’ numbers to search.
  2. Click ‘Find’
  3. Select the move order lines by checking left hand side check box
  4. Click ‘Allocate’ if not allocated already. Allocation will reserve the onhand quantity to the move order.
  5. Click ‘View/Update allocations’ to change allocation/reservation details.
  6. Click ‘Transact’ to executes the transaction.
  7. Click ‘OK’ once ‘Transaction Complete’ message appears.
Transact Move Order
Transact Move Order


Transact Move Orders

  • Form Application: Inventory
  • Form Name: INVTOTRX
  • Form Path: /oracle/apps/r12/visr12/apps/apps_st/appl/inv/12.0.0/forms/US/INVTOTRX.fmx

Transact Move Orders screen is used to allocate the material, view/update allocations and finally to execute the transactions.

Move Order must be in APPROVED status to transact it.

Transact Move Order - Oracle Inventory
Description
In this tutorial / video you will learn how to transact the approve move orders. For more details visit http://oracleappscommunity.com/oracle/blog/2027/transact-move-orders/

Navigation: Login to Oracle Apps -> Select Inventory responsibility -> Move Orders -> Transact Move Orders.

  1. Enter the ‘Move Order From’ and ‘Move Order To’ numbers to search.
  2. Click ‘Find’
  3. Select the move order lines by checking left hand side check box
  4. Click ‘Allocate’ if not allocated already. Allocation will reserve the onhand quantity to the move order.
  5. Click ‘View/Update allocations’ to change allocation/reservation details.
  6. Click ‘Transact’ to executes the transaction.
  7. Click ‘OK’ once ‘Transaction Complete’ message appears.
Transact Move Order

Transact Move Order


Now Move order successfully transacted i.e. onhand inventory is transferred from ‘Source subinventory/locator’ to ‘destination subinventory/locator’.


6.0 Create Move Orders


  • Form Application: Inventory
  • Form Name: INVTOMAI
  • Form Path: /oracle/apps/r12/visr12/apps/apps_st/appl/inv/12.0.0/forms/US/INVTOMAI.fmx

Move Orders are similar to ‘Subinventory Transfers’. Subinventory transfer is single step process, but move orders are two/three step process. Move Order Transfer is used to transfer within and across subinventories.

  • Step-1: Requestor requests the material by entering move order details
  • Step-2: Requestor’s manager approves the move order request (this is optional step, you can have move orders auto approved or configured through workflow approval process)
  • Step-3: Move order is transacted, confirming the material move. Onhand inventory is adjusted based on move.
Create Move Order - Oracle Inventory
Description
Move Orders are used to transfer or issue material. When it is for transfer we need to enter FROm and TO subinventory and location, if it is for move order issue then we need to enter GL a/c to which inventory must be charged.
For more detailed tutorial on how to create move order transfers visit us at http://oracleappscommunity.com/oracle/blog/2023/create-move-orders/

Navigation: Login to Oracle Apps -> Select Inventory responsibility -> Move Orders -> Move Orders.

  • Number: Enter the move order number or leave it blank for auto numbering
  • Description: Brief description of move order
  • Transaction Type: Select as Move Order Transfer
  • Source Subinventory: Select ‘From’ subinventory from which material should be withdrawn. Onhand must exist at this subinventory.
  • Source locator: If the item is locator control enter the source locator.
  • Destination subinventory: Enter the subinventory to which onhand should be  moved.
  • Destination locator: Enter the destination locator if the subinventory is locator controlled.
  • Date Required: Change the date required, default date will be current date.

Go to move order lines and enter additional information.

  • Item: Enter the item that should be moved/transacted.
  • Transaction Type: Defaulted from header, but can be changed at line level.
  • Date required: Defaulted from header, but can be changed at line level.
  • UOM: Enter the transaction Unit of measure
  • Primary Quantity: Enter the ‘quantity’ to be transacted.
  • Source subinventory/locator: Under ‘source’ tab change the default subinventory/locator if required.
  • Destination subinventory/locator: Under ‘destination’ tab change the default subinventory/locator information if required.
  • Project and Task: If the material transfer is belongs to a project, enter the project/transfer information.
  • Reason/Reference: Under ‘control’ tab enter the transaction reason and reference, this is optional.
Create Move Order

Create Move Order

Save the information entered, Click ‘Approve’ to approve the Move Order.

If Move Order approval workflow is setup and configured then it will go through the approval workflow, otherwise it will get auto approved.

Move Order status changed to ‘APPROVED’. Note down the move order number.